(Updated December 28, 2010)
Part 1: Creating a .txt File for Download
- Start by saving a deck from MTGO as a text document (choose “Local Text Deck”).
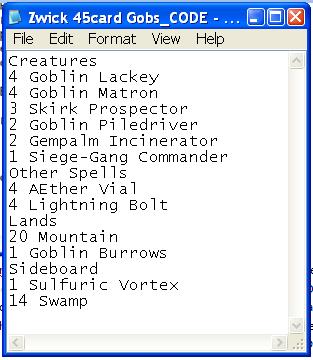
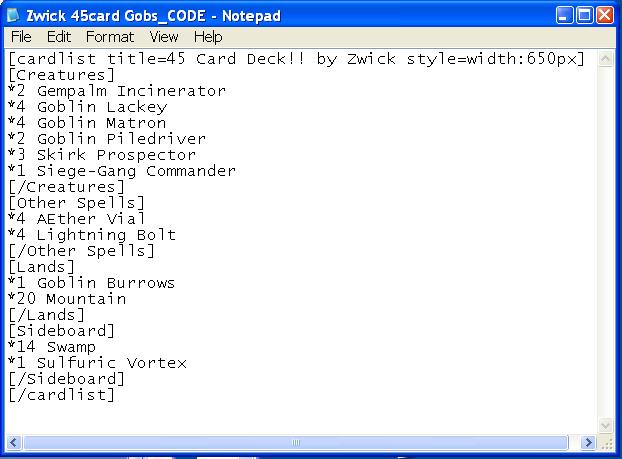
- It should look like the following when you you open it in Notepad. (If you are adding the deck from another site, you should probably type it up in Notepad so it has the same format).
- If you had to type the list, you should load it up into the MTGO deck editor to see if any cards are misspelled or if the formatting is incorrect. If you have any errors in uploading, just manually add the cards to the deck via the MTGO deck editor and resave the complete list over the one with errors. This process is to ensure that we have no errors if the deck is to be offered as a download.
- If the file is to be download, save the file name as something easily distinguishable (i.e., UWR_stdsing_Jan09.txt or Zwick_Esper_Pauper.txt) and attach it to the e-mail with your article submission.
Part 2: Formatting the Deck List in the Article
(This is where the fun begins… but only really for Singleton lists)
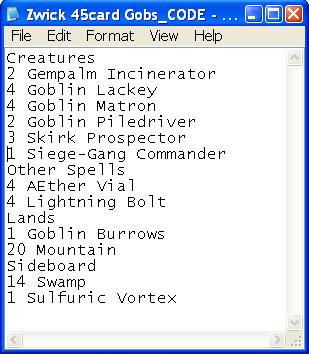
- For decklists, we use “Creatures”, “Other Spells”, “Lands” and “Sideboard” as headers, but we have no way to auto sort these cards. That means manual sorting is required. Please sort deck lists in the following order (unless told otherwise): Creatures, Other Spells, Lands, Sideboard.
- Notice that I also saved the file as “blahblah_CODE.txt” to distinguish it from the deck list file that we created earlier.
- Next, I alphabetize the cards in each category. It is easy to do manually for 60 card lists, but I use the sort function in Microsoft Word (have to paste over list from the Notepad document) to do Singleton lists. The function doesn’t work for non-Singleton lists, because it will sort by number over alphabet (since the number comes first in the alphanumeric sort algorithm).
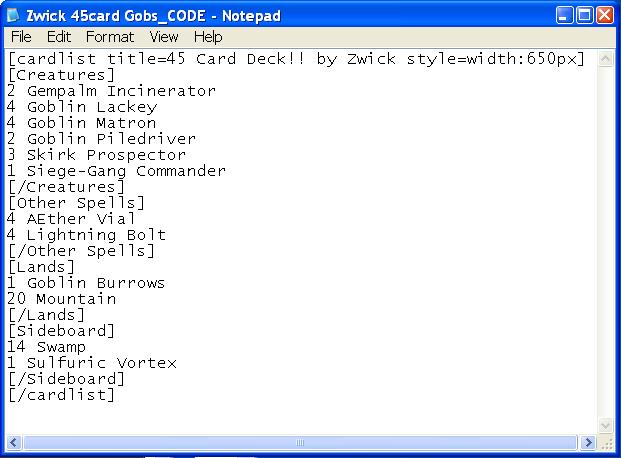
- Now it gets pretty easy- we have to add in the tags so that our deck list tool recognizes the input. All categories need to be put in square brackets (i.e. “[Creatures]“) and each category must be close with the same tag adding a backslash (i.e. “[/Creatures]“).
- After category tags, a header and closer tag needs to be added. The header tag is “[cardlist title={NAME} style=width:650px]”, where {NAME} is whatever the deck’s title should be. The closer tag is “[/cardlist]”.
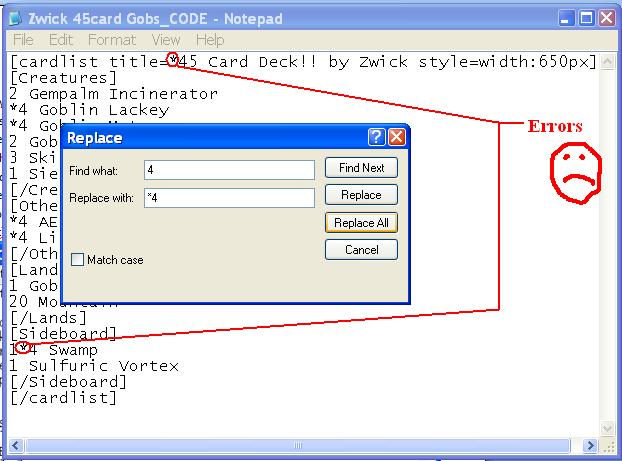
- Next, I use “Edit > Replace…” to insert asterisks in front of all of the quantities of cards. Use the “Replace All” button, but be aware that it will erroneously add asterisks in some places (and you will need to erase them).
- After the asterisks are properly added, your list should look like this:
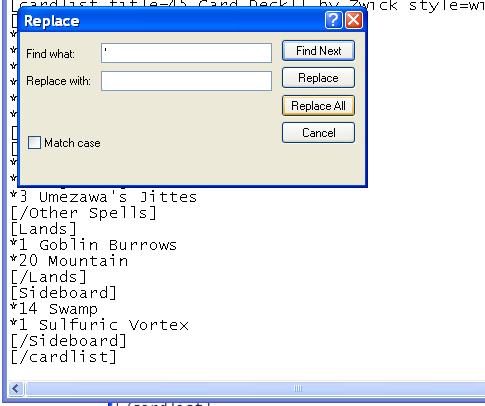
- Also, our deck list tool does NOT display apostrophes correctly. This means that you need to use “Replace…” to delete all apostrophes- it’s very easy, just leave the “Replace with:” text box empty.
The End Result
- Congrats, you’re done! This is how we make your deck list look pretty!
45 Card Deck, By Zwick
|
| ||||||||


